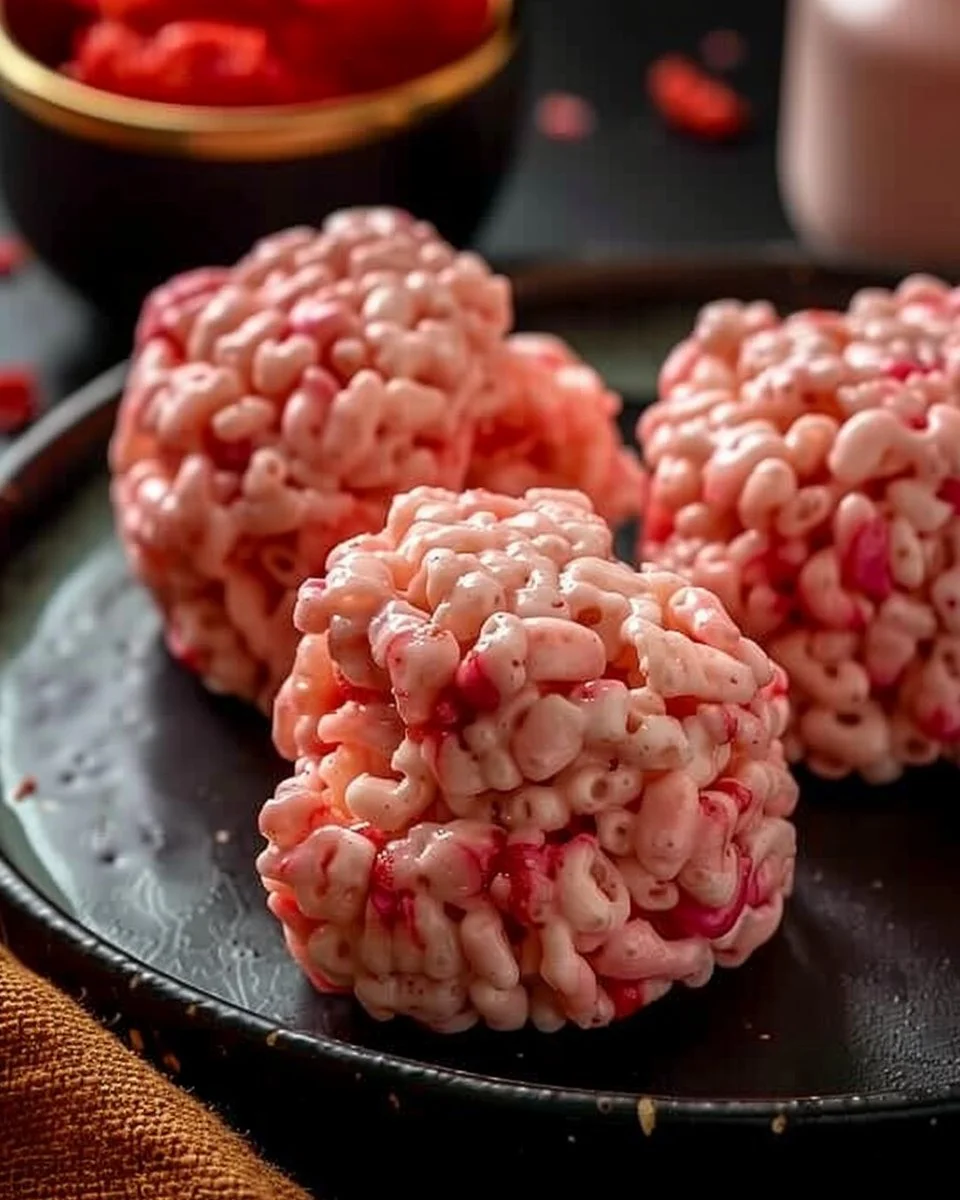
Rice Krispies Brains: A Spooky Delight
When it comes to festive treats, few things can beat the fun and creativity involved in making themed snacks. Rice Krispies Brains are not only a delicious, chewy treat but also a perfect addition to Halloween parties, spooky movie nights, or any event that calls for a bit of thematic flair. These eye-catching snacks are easy to make and are guaranteed to impress your guests. With just a handful of ingredients and a little bit of imagination, you can whip up these delightful treats that look as good as they taste.
Ingredients
To create these Rice Krispies Brains, you’ll need the following ingredients:
- 5 cups (132g) Rice Krispies (or any kind of crispy rice cereal)
- ¼ cup (57g) unsalted butter
- 1 10-oz bag (283g) mini marshmallows (about 8 cups)
- Red food coloring
These simple ingredients come together to form an easy base for your spooky creation. The combination of crispy cereal, gooey marshmallows, and the dash of red coloring brings the signature brain look to life.
Instructions
Follow these steps to make your Rice Krispies Brains:
- Line a large baking sheet with parchment paper or a silicone baking mat and set it aside.
- In a large bowl, place the Rice Krispies and set them aside for later.
- In a large saucepan, melt the unsalted butter over low heat.
- Once the butter is melted, add the mini marshmallows to the saucepan and stir until they are completely melted.
- After the marshmallows have melted, add red food coloring to achieve your desired shade. Keep in mind that the color will appear lighter once combined with the Rice Krispies. A good starting point is about six drops of red coloring for a nice pinkish hue.
- Remove the saucepan from heat and pour the colored marshmallow mixture over the Rice Krispies. Stir until the cereal is well-coated with the marshmallow mixture.
- Using an ice cream scoop or a ¼ cup measuring cup sprayed with non-stick spray, gently scoop a portion of the Rice Krispies mix and drop it onto the prepared baking sheet. Shape each mound into a slightly oblong circle to mimic a brain’s shape.
- To add detail, use the handle of a butter knife to create indentations on the top of each oblong mound, resembling the brain’s lobes.
- For an extra spooky touch, add a few drops of red food coloring to a small bowl and use a paintbrush to create streaks of "blood" on the brains, if desired.
- Allow the Rice Krispies Brains to cool and set completely before serving.
Once finished, you’ll have a stunningly creepy snack that will be the star of any Halloween gathering!
Benefits of This Craft
Creating Rice Krispies Brains offers several benefits beyond merely satisfying your sweet tooth. For starters, it encourages creativity and hands-on engagement, whether you’re making them alone or with friends and family. This activity promotes fine motor skills, especially in children, as they form the brains and use kitchen tools.
Additionally, making these treats can provide a sense of accomplishment. There’s immense joy in crafting something visually appealing and delicious, which can enhance your mood and promote bonding experiences if done with others. Lastly, these brain-shaped treats are customizable, allowing you to modify ingredients, experiment with flavors, or alter the color scheme to suit your particular theme or taste.
Tips for Success
Creating Rice Krispies Brains can be a fun process, but here are some key tips to ensure your treats turn out perfect:
- Use Fresh Marshmallows: Fresh mini marshmallows will provide the best texture and flavor. Old marshmallows can lose their elasticity and may not mix well.
- Non-stick Spray: When using scoops or measuring cups to shape your Rice Krispies, always spray with non-stick cooking spray. This prevents the mixture from sticking and makes shaping easier.
- Don’t Rush: Allow the marshmallow mixture to cool slightly before handling it. This will make it less sticky and easier to mold.
- Make It Your Own: Experiment with different colors for the "blood." You might use blue or green food coloring to create different variations of the brain, perfect for various occasions.
- Get Creative with Streaks: Instead of a brush, you can also use a squeeze bottle filled with colored frosting to create streaks for added uniqueness.
What Do They Taste Like?
The taste of Rice Krispies Brains is a delightful combination of sweetness and crunch. The buttery flavor of the melted marshmallows is balanced by the crispy texture of the Rice Krispies. The added red food coloring, while primarily visual, might evoke thoughts of a rich, sweet flavor, adding to the fun without altering the taste significantly. These treats are chewy yet light, making them a delightful experience for your palate. The fun shape and appearance will add to the overall enjoyment, as they are just as fun to eat as they are to look at.
How to Store
Proper storage is key to maintaining the freshness of your Rice Krispies Brains. Once the treats have completely cooled, store them in an airtight container to keep them soft and chewy. When stored correctly, they can last up to one week. However, to keep the best texture, it is advisable to consume them within the first few days. If you find yourself with an abundance of treats, you may also consider freezing them. To do this, layer them with parchment paper and store them in a freezer-safe container. Thaw them at room temperature when you’re ready to enjoy them again.
Conclusion
Rice Krispies Brains are not just a treat for the taste buds; they are a festive celebration of creativity and fun. They add a unique touch to any gathering, inviting both kids and adults to enjoy a spooky snack. With straightforward ingredients and step-by-step instructions, these brain-shaped Rice Krispies treats are sure to become a seasonal favorite in your household. So gather your ingredients, channel your inner Halloween spirit, and start crafting these delicious brainy delights today!
FAQ
Q: Can I customize the color of the brains?
A: Yes! You can use different food coloring or even chocolate to create varying shades for your brains.
Q: What if I don’t have Rice Krispies?
A: You can use any type of crispy rice cereal or even other cereals like corn flakes as a substitute.
Q: Can I add other ingredients?
A: Absolutely! You can add sprinkles, chocolate chips, or even flavored extracts to enhance the treats’ flavor.
Q: How do I serve the Rice Krispies Brains?
A: They can be served immediately after setting on a decorative platter or kept in the container until ready to serve.
Q: Is this recipe suitable for kids?
A: Yes! Making these treats is a fantastic activity for kids, as long as they are supervised while handling hot melted marshmallows.

Rice Krispies Brains
- Prep Time: 15 minutes
- Cook Time: 10 minutes
- Total Time: 25 minutes
- Yield: 20 servings
- Category: Dessert
- Method: Baking
- Cuisine: American
- Diet: Vegetarian
Description
These whimsical Rice Krispies treats are perfect for Halloween parties, combining sweetness and a spooky appearance.
Ingredients
- 5 cups (132g) Rice Krispies
- ¼ cup (57g) unsalted butter
- 1 10-oz bag (283g) mini marshmallows (about 8 cups)
- Red food coloring
Instructions
- Line a large baking sheet with parchment paper or a silicone baking mat and set it aside.
- In a large bowl, place the Rice Krispies and set them aside for later.
- In a large saucepan, melt the unsalted butter over low heat.
- Add the mini marshmallows to the saucepan and stir until completely melted.
- Add red food coloring and stir to achieve your desired shade.
- Remove from heat and pour the marshmallow mixture over the Rice Krispies, stirring until well-coated.
- Scoop portions of the mixture onto the prepared baking sheet and shape them into slightly oblong circles.
- Create indentations on top of each mound to resemble the brain lobes.
- For a spooky touch, add red streaks of food coloring using a paintbrush.
- Allow to cool and set completely before serving.
Notes
For best results, use fresh mini marshmallows. You can customize the colors and shapes for different occasions.

