Zombie Pudding Cups: A Spooktacular Dessert Delight
Halloween brings with it a unique charm filled with spooky decorations, creative costumes, and, of course, delightful treats. One such delightful treat that captures the essence of the season while appealing to both children and adults is the Zombie Pudding Cup. This dessert not only looks visually stunning but is also a delightful blend of flavors. In this article, we will explore the presentation, ingredient list, instructions, benefits of this craft, tips for success, an overview of what the taste and texture are like, how to store them properly, and much more.
Presentation
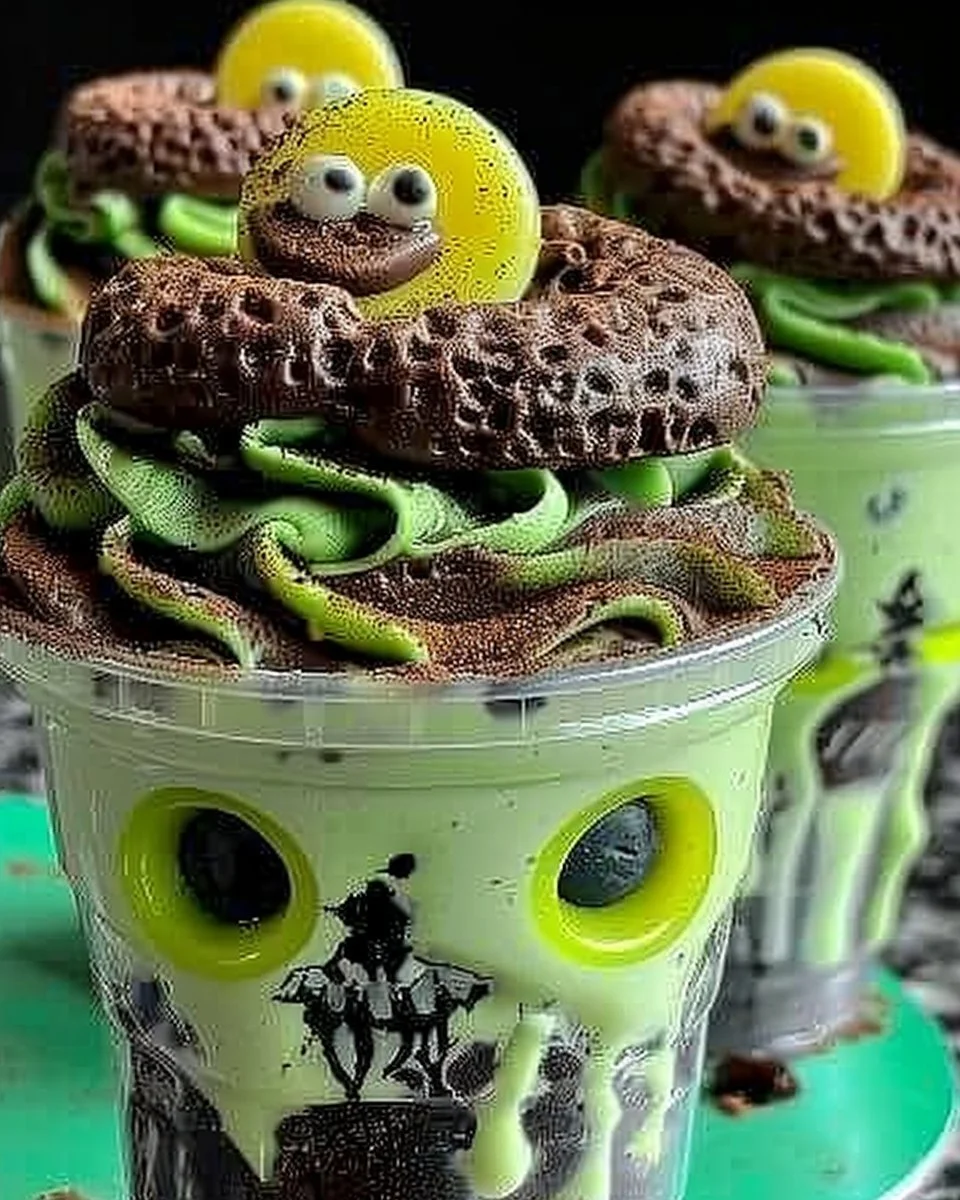
The allure of the Zombie Pudding Cups begins with their presentation. Served in clear cups, the vibrant layers of chocolate and vanilla pudding simulate the earthy layers of soil and the surface of the grave, making them a perfect addition to any Halloween gathering. The creamy whipped topping adds a ghostly touch, while the chocolate crumbs sprinkled on top evoke dark dirt, creating an inviting yet eerie dessert. Finally, the gummy worms slithering out make this treat both creepy and fun, perfect for capturing the interest of party-goers of all ages. The colorful and textured appearance predestines them as a centerpiece dessert, inviting all to indulge in this devilishly delicious creation.
Ingredients
For an ideal batch of Zombie Pudding Cups, you will need the following ingredients:
- 1 package of chocolate pudding mix
- 1 package of vanilla pudding mix
- 2 cups of milk (adjust according to the pudding mix package)
- Gummy worms (as many as needed for decoration)
- Whipped cream (optional, for an added luxurious touch)
- Chocolate crumbs (for a dirt-like effect)
This combination creates an elegant and multi-layered dessert that is both simple to prepare and visually appealing.
Instructions
Creating your Zombie Pudding Cups is a fun and straightforward process that requires no culinary expertise—making it a perfect activity for families, especially during the Halloween season. Follow these steps:
- Begin by preparing the chocolate pudding according to the package instructions. This typically involves mixing the chocolate pudding mix with a specified amount of milk until smooth and thickened.
- In separate bowls, prepare the vanilla pudding mix, following the package instructions as well. As with the chocolate pudding, you’ll blend it with milk until it reaches a creamy consistency.
- Choose clear cups or bowls to showcase your dessert layers. Start by layering the chocolate pudding at the bottom of each cup. This forms a rich, dark base that sets the stage for the rest of the layers.
- Next, add a layer of vanilla pudding on top of the chocolate pudding. The contrast of the white and dark creates a striking visual effect reminiscent of ghostly apparitions.
- If you wish, add a generous dollop of whipped cream on top of the vanilla layer. This creamy addition provides a delightful texture and a hint of sweetness.
- Sprinkle chocolate crumbs on top to simulate dirt. This provides a thematic touch that complements the Halloween vibe perfectly.
- Finish your masterpiece by placing gummy worms on top, allowing them to peek out as though they’re crawling from the ‘grave.’ The dessert is now ready to serve chilled. Enjoy this hauntingly delicious treat!
Benefits of This Craft
Aside from being a crowd-pleaser at Halloween parties, creating Zombie Pudding Cups comes with numerous benefits. Firstly, this craft fosters creativity, as you can design your dessert according to your preferences by choosing different layers and toppings. Furthermore, it’s an excellent opportunity for family bonding, whether you are cooking with your children or having a Halloween-themed gathering.
Another significant benefit is the simplicity of the recipe. The minimal number of ingredients and straightforward steps appeal to both novice chefs and seasoned bakers, making it accessible to everyone. Additionally, you can prepare these cups in advance, saving time on the day of your festivities. Lastly, the ingredient list allows for some flexibility; for instance, you can opt for sugar-free pudding or alternate toppings based on dietary needs.
Tips
When creating your Zombie Pudding Cups, consider these helpful tips to enhance both the process and the final presentation. First, ensure that the cups you use are completely clear and made of glass or plastic. This keeps the focus on your luscious layers.
When layering the puddings, allow each layer to set slightly before adding the next. This precaution helps maintain the distinction between layers, elevating the visual impact of your dessert. Drizzling some chocolate syrup or colored frosting can add an extra flavor note and an eye-catching design to your whipped cream.
For a haunting twist, consider adding edible eyes on top of the whipped cream or integrating other spooky candy decorations (such as mini chocolate tombstones or candy eyeballs) to make the cups extra festive.
What Taste Like?
The Zombie Pudding Cups provide a symphony of flavors and textures that delight the palate. The rich, creamy chocolate pudding offers a deep and decadent chocolate flavor that pairs beautifully with the sweet, silky vanilla pudding, creating a balance that is satisfying and delicious. The whipped cream adds a lightness that contrasts with the denser puddings, while the chocolate crumbs introduce a crunchy texture that complements the creamy layers. Finally, the gummy worms add a playful element—both in taste and presentation—that enhances the overall experience, making it feel like a true Halloween treat.
How to Store
To keep your Zombie Pudding Cups fresh and delicious, proper storage is essential. If prepared in advance, cover the cups with plastic wrap and store them in the refrigerator. Keeping them chilled helps preserve both their texture and flavor. It’s best to consume the cups within three days for optimal freshness. If you are including gummy worms, consider adding them just before serving to prevent them from becoming overly soggy or lost in the pudding.
Conclusion
Zombie Pudding Cups are a delightful and visually engaging dessert that captures the spirit of Halloween. With minimal ingredients and simple steps, these pudding cups are perfect for home cooks of all levels. They provide a wonderful opportunity for creativity, family bonding, and, most importantly, a deliciously spooky treat that guests will love. So gather your ingredients, channel your inner monster, and whip up these fun and festive dessert cups to add a sweet touch to your Halloween festivities.
FAQ
Can I use alternative pudding flavors for the Zombie Pudding Cups?
Yes! While chocolate and vanilla are traditional choices, feel free to experiment with different flavors such as strawberry or pistachio for a unique twist.
How long can I prepare the Zombie Pudding Cups ahead of time?
You can prepare them a day in advance and store them in the refrigerator. However, adding gummy worms should be done just before serving.
What can I use instead of gummy worms?
If you want to substitute gummy worms, consider using other candies like chocolate spiders, edible eyeballs, or Halloween-themed chocolates.
Is there a way to make the pudding cups healthier?
Definitely! Using sugar-free pudding, low-fat milk, and substituting whipped cream with a lighter topping such as whipped coconut cream can help create a healthier version.

Zombie Pudding Cups
- Prep Time: 15 minutes
- Cook Time: 0 minutes
- Total Time: 15 minutes
- Yield: 4 servings
- Category: Dessert
- Method: No cooking required
- Cuisine: American
- Diet: Vegetarian
Description
A spooky and delightful dessert perfect for Halloween gatherings, featuring layers of chocolate and vanilla pudding with gummy worms.
Ingredients
- 1 package of chocolate pudding mix
- 1 package of vanilla pudding mix
- 2 cups of milk
- Gummy worms (for decoration)
- Whipped cream (optional)
- Chocolate crumbs (for garnish)
Instructions
- Prepare the chocolate pudding according to the package instructions by mixing with milk until smooth.
- In a separate bowl, prepare the vanilla pudding mix, blending it with milk until creamy.
- Layer chocolate pudding at the bottom of clear cups.
- Add a layer of vanilla pudding on top of the chocolate pudding.
- Add a dollop of whipped cream on top of the vanilla layer if desired.
- Sprinkle chocolate crumbs on top to simulate dirt.
- Finish by placing gummy worms on top for decoration.
- Serve chilled and enjoy!
Notes
For best results, allow each layer to set slightly before adding the next. Add gummy worms just before serving to maintain texture.

