
Condensed Milk Snow Cookies Recipe : there is something magical about baking cookies. The scents that fill your home, the smiles they bring, and the moments shared over warm treats make it one of the most comforting activities. One cookie that shines bright among many is the Condensed Milk Snow Cookies. These little delights combine the rich sweetness of condensed milk with a soft, buttery texture that seems to melt in your mouth.
Baking these cookies is not just about satisfying a sweet tooth; it is about creating warm memories. Whether you are celebrating a holiday, hosting a family gathering, or just sharing a cozy afternoon with a friend, these cookies can bring joy to any moment. You can make them for parties, enjoy them with coffee, or give them as delicious gifts to loved ones. In this article, we will explore why you will fall in love with this recipe, how to prepare these delightful cookies, and a few tips to make the most of your baking experience.
Why You Will Love This Recipe
The Condensed Milk Snow Cookies are loved for several reasons. First, they are incredibly easy to make. Unlike some other cookie recipes that require multiple steps and complicated techniques, this one comes together quickly. Just mix the ingredients, shape the cookies, and bake. Even beginners can create these delicious treats with little fuss.
Second, the taste is out of this world. The richness of the condensed milk adds a lovely sweetness that pairs perfectly with the buttery base of the cookie. They are soft and chewy with just the right amount of sweetness to satisfy your cravings without overwhelming your taste buds.
Third, these cookies are very versatile. You can enjoy them plain, dust them with powdered sugar for a snowy look, or even add in some extras like chocolate chips or nuts. No matter how you choose to make them, they are sure to be a hit.
Lastly, baking these cookies is a great way to bond with family and friends. Whether you are baking alone or with loved ones, preparing food together nurtures connections and creates lasting memories. These cookies are sure to become a beloved part of your baking tradition.
How to Prepare Condensed Milk Snow Cookies
Now that you cannot wait to get started, let’s dive into how to prepare these tasty Condensed Milk Snow Cookies. Below, you will find a complete list of ingredients, along with step-by-step instructions to guide you through the baking process.
Ingredients:
- 1 cup of unsalted butter, softened
- 1 cup of sweetened condensed milk
- 3 cups of all-purpose flour
- 1 cup of powdered sugar (for dusting)
- 1 teaspoon of vanilla extract
- ¼ teaspoon of salt
Instructions:
- Preheat the Oven: Begin by preheating your oven to 350°F (175°C). This step is important to ensure that your cookies bake evenly and get that nice golden color.
- Cream the Butter: In a large mixing bowl, add the softened unsalted butter. Use a hand mixer or stand mixer to cream the butter until it is light and fluffy. This should take about 2-3 minutes.
- Add Condensed Milk: Next, pour in the sweetened condensed milk and vanilla extract. Mix them together until well combined. The mixture should be creamy and smooth.
- Combine Dry Ingredients: In a separate bowl, whisk together the all-purpose flour and salt. This helps to distribute the salt evenly throughout the flour.
- Mix Everything Together: Gradually add the flour mixture to the butter and condensed milk mixture. Use a spatula or spoon to fold the flour into the wet ingredients. Be gentle; do not overmix. You want to combine them just until you no longer see dry flour.
- Shape the Cookies: Once you have your dough ready, scoop small amounts of the dough and roll them into balls, about 1 inch in diameter. Place them on an ungreased baking sheet, leaving space between each cookie to allow for spreading.
- Bake: Place the baking sheet in the preheated oven and bake for about 12-15 minutes. The cookies should be lightly golden around the edges but still soft in the center.
- Cool: Remove the cookies from the oven and allow them to cool on the baking sheet for about 5 minutes. Then, transfer them to a wire rack to cool completely.
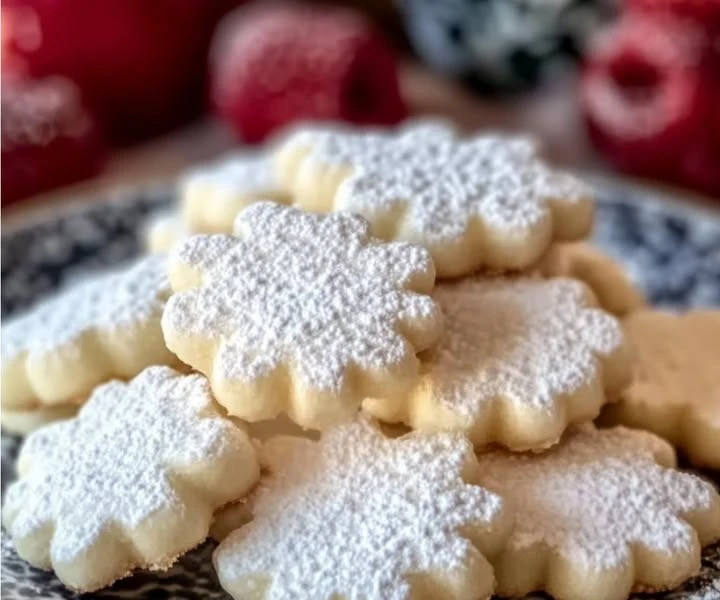
- Dust with Sugar: Once the cookies are completely cool, take a big plate and pour powdered sugar on it. Roll each cookie gently in the powdered sugar to coat them well. This gives them the “snowy” appearance that makes them special!
- Serve and Enjoy: Now your Condensed Milk Snow Cookies are ready to be enjoyed!
How to Serve Condensed Milk Snow Cookies
Serving Condensed Milk Snow Cookies is as simple as placing them on a beautiful plate and enjoying them with friends and family. Here are a few ideas on how to serve them:
- With a Cup of Cocoa: Pair these cookies with a warm cup of hot chocolate or cocoa for a cozy treat that warms your heart on chilly days.
- At Parties: Place them on a dessert table at your next party or family gathering. Their snowy appearance adds a festive touch to any occasion.
- Include in Gift Baskets: These cookies make a delightful addition to homemade gift baskets. Wrap them in cute packaging, and they are perfect for holiday gifts, birthdays, or just to show appreciation to someone special.
- With Tea or Coffee: Enjoy them with your afternoon tea or coffee. The flavors of the cookies complement these warm drinks nicely.
How to Store Condensed Milk Snow Cookies
To keep your Condensed Milk Snow Cookies fresh for as long as possible, follow these storage tips:
- In an Airtight Container: Store the cookies in an airtight container at room temperature for up to one week. This helps maintain their soft and chewy texture.
- In the Refrigerator: If you live in a warm climate or want to keep them fresh for a longer period, you can store them in the refrigerator for up to two weeks. Just be sure to let them come to room temperature before serving, as they taste best when softened.
- Freezing: You can freeze these cookies if you want to keep them longer. Place them in an airtight container or resealable freezer bag with parchment paper between layers. They can be frozen for up to three months. When ready to enjoy, simply let them thaw at room temperature.
Tips for Preparing Condensed Milk Snow Cookies
- Use Softened Butter: Make sure your butter is softened to room temperature before you start. This ensures that it creams well with the sugar and creates a light cookie.
- Don’t Overmix: When mixing the flour into the wet ingredients, be careful not to overmix the dough. Overmixing can lead to tough cookies. Just mix until combined.
- Chill the Dough: If the dough seems too soft to form balls, you can chill it in the refrigerator for 30 minutes. This makes it easier to handle.
- Experiment with Flavor: Feel free to add extra flavorings if you like. A pinch of almond extract, a sprinkle of cinnamon, or citrus zest can enhance the taste of your cookies.
Variation
While the Condensed Milk Snow Cookies are delicious as is, you can easily customize them to suit your taste. Here are a few variations for you to try:
- Chocolate Chip Addition: Add chocolate chips to the dough before baking for a chocolatey twist. You can use dark chocolate, milk chocolate, or white chocolate, depending on your preference.
- Nutty Flavor: Incorporate chopped nuts, such as walnuts or pecans, to give the cookies a crunchy texture. You can mix in about ½ cup of nuts.
- Coconut Topping: For a tropical twist, roll the finished cookies in shredded coconut instead of powdered sugar. It adds flavor and texture while still keeping the snowy appearance.
Frequently Asked Questions
1. Can I use unsweetened condensed milk in this recipe?
No, you should use sweetened condensed milk for this recipe. The sweetness in the milk is crucial for the cookies’ flavor and texture.
2. Can I make the dough ahead of time?
Yes, you can prepare the dough ahead of time. Store the wrapped dough in the refrigerator for up to 2 days before baking, or freeze it for up to three months. Just remember to thaw it before baking.
3. What if my cookies spread during baking?
If your cookies spread too much, it could be due to the dough being too warm. Make sure to chill the dough if you’re having issues, and check your oven temperature to ensure it’s accurate.
Now that you have all the information you need, it’s time to head to your kitchen and start baking these delightful Condensed Milk Snow Cookies! Enjoy the process, share them with those you love, and savor every bite. Happy baking!